Cox Chaparral 2D project...
12. Okt 2011, 16:58
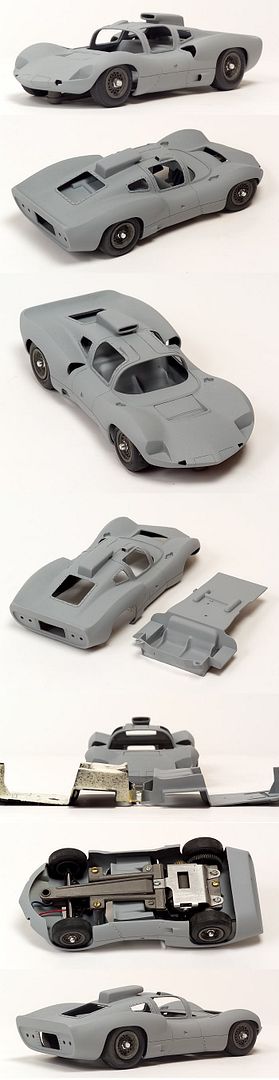
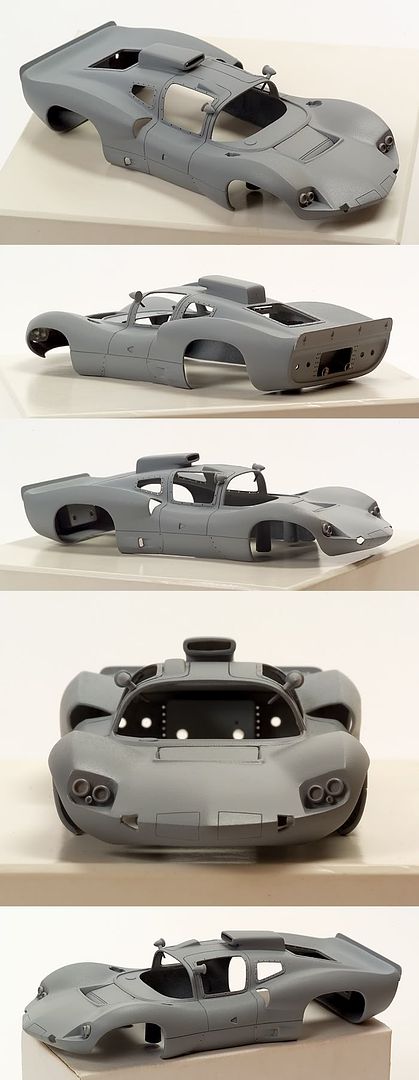
The first think I wanted to do with this car was to lower the car to a better stance. In order to that you have to cut the interior down (check photos) along with the posts. The good news about dropping the interior is that the wires from the motor fit better under the interior. I'm not using the original headlights so I have filled in the holes. I'll use a more realistic set of lights. I also fitted the black wrap for the windows. These will be fitted with rivets later. The body is not done yet but half way there. More details will be added. The chassis will be sand blasted along with the wheels. This car should look pretty good when it's done.
12. Okt 2011, 16:58
Re: Cox Chaparral 2D project...
14. Okt 2011, 12:15
The racecars from Chaparral are my favourites. I like this style very much! I'm really looking forward to the next images.
As always, a beautiful work

best regards Eisenhein.
Re: Cox Chaparral 2D project...
14. Okt 2011, 12:48
you're a really Model-God

Like to see "him" painted
Re: Cox Chaparral 2D project...
14. Okt 2011, 19:55
Update...
Building the rear spoiler. All I did here was use a piece of styrene and cut it down to size. Sanded the edges down cut 4 slits even across. I found some old round small etched hood hinges with holes in the middle and placed rivets in the middle of them. I then lined them up and glued them into place and then cleaned up the back of the spoiler. I've added scratched built door handles which I'll remove and add to the finished body later. You can see I've already started to clean up the body some more and I will do more clean up later before painting.
Please keep in mind that this is not meant to be accurate and there will be some exaggeration
More detailing to come
Onward...

Re: Cox Chaparral 2D project...
17. Okt 2011, 18:21
which primer you are using? the surface is very smooth

best regards Eisenhein.
Re: Cox Chaparral 2D project...
2. Nov 2011, 00:29
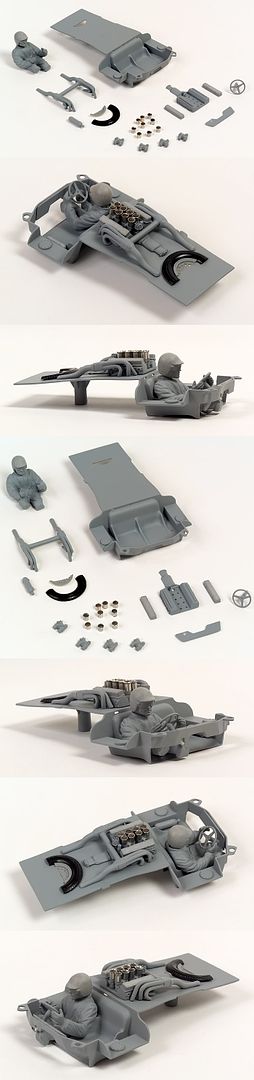
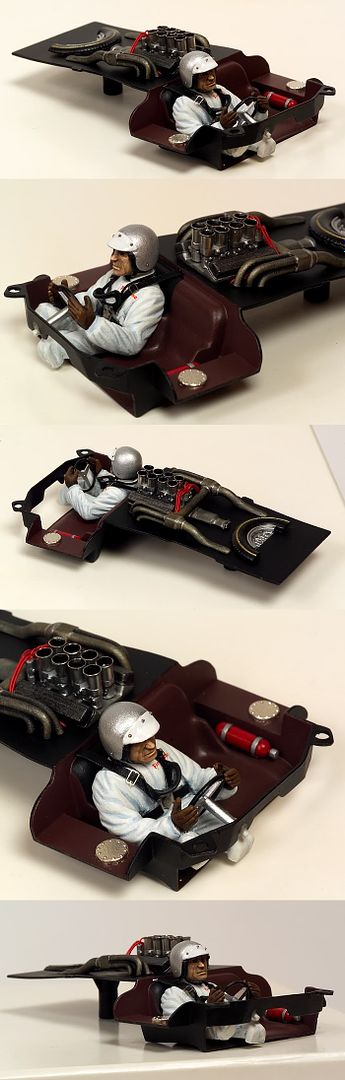
Here's some photos of the 2D interior. I wanted to do something different with the inside. I'm sure are some problems here and fore sure it will be pointed out to me but that's okay. All I wanted to do is add some more detail and make this car a little more than just the Cox kit. Needless to say, the parts are only placement glued and still need some clean up. Once all this is done, I'll nail it down. I might add, there will be more detail added after painting which should be a lot of fun. I did re-sculpt the driver a bit to make it work better and look a little more natural.
Anyway, onward...
Re: Cox Chaparral 2D project...
3. Nov 2011, 17:50
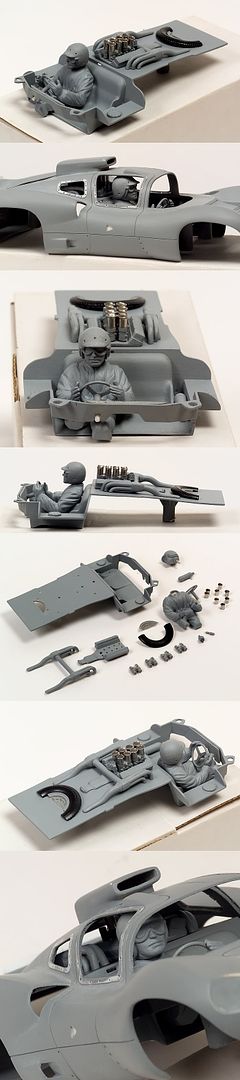
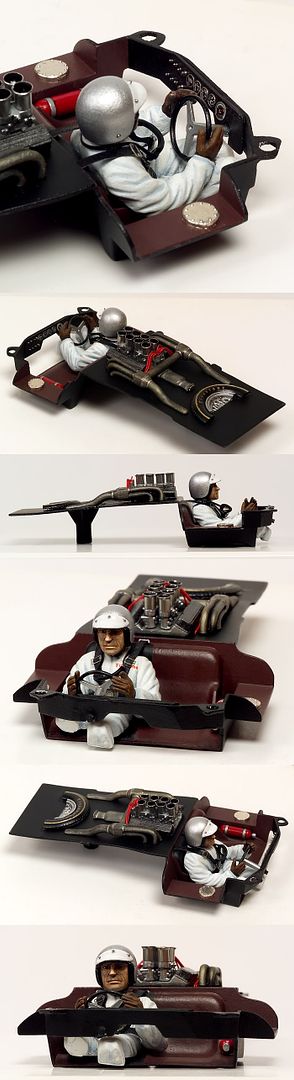
I went ahead and did some changes. The engine was too high and needed to be lowered. This is just glued for placement only and will be nailed down later. The trumpets are not glued but they do line up correct.
Onward....
Re: Cox Chaparral 2D project...
4. Nov 2011, 23:06
The final changes. I lowered the pipes and pinned the parts. Notice the holes on the back platform. On to the body.
Re: Cox Chaparral 2D project...
7. Nov 2011, 18:44

Re: Cox Chaparral 2D project...
8. Nov 2011, 19:55
A wonderful driver figure. His view is fascinating, the glasses around the neck is a great idea.
best regards Eisenhein.
Re: Cox Chaparral 2D project...
8. Nov 2011, 20:43
thank you very much for sharing this! I like to see the development of a project like this!
One can see, that painting is a job, that gives you much fun...
How did you make the glasses (esp. the thicker "surrounding" of the glasses)?
Very kind regards, Taffy
Re: Cox Chaparral 2D project...
9. Nov 2011, 22:13
Taffy... I used another Cox head (a little beat up) and cut the goggles away. Then all I did is shape them up, paint them and then filled the cap with 5 min clear epoxy.
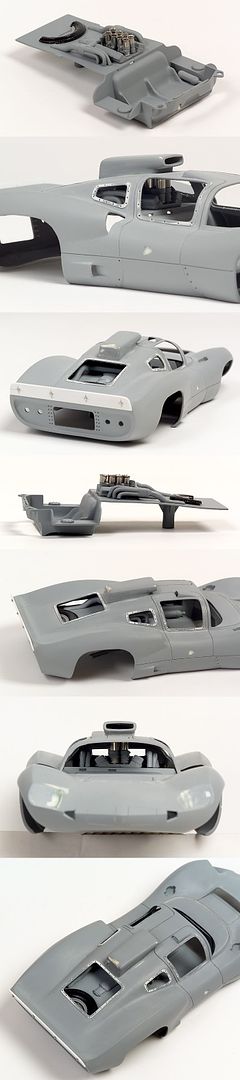
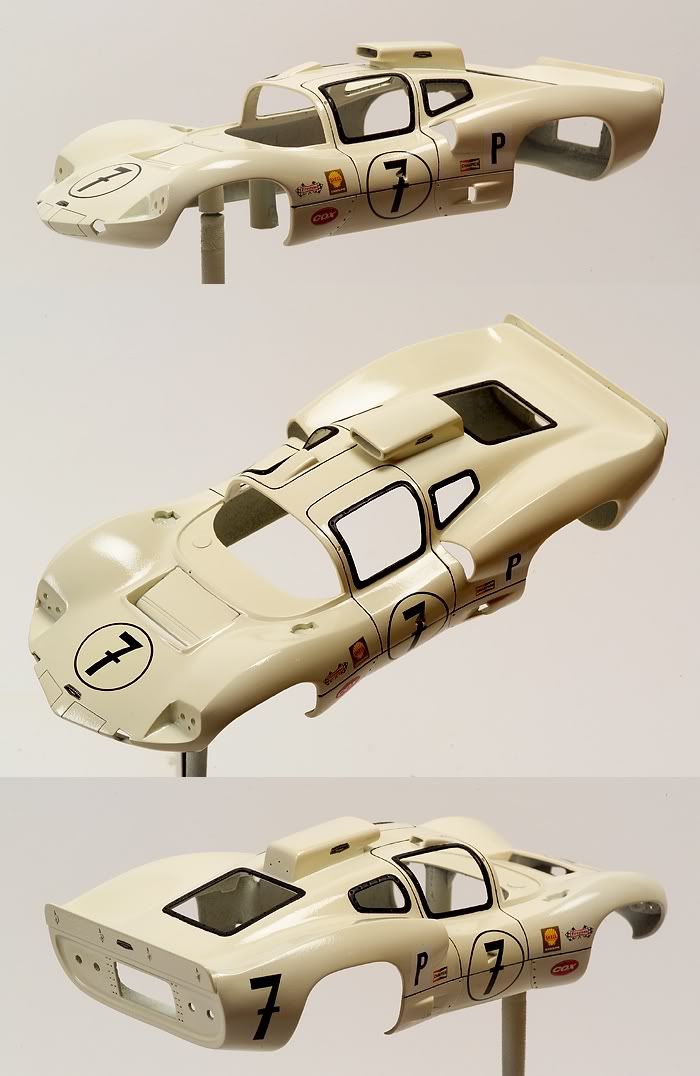
Almost finished the body. I've scratch built the mirrors and the front head lights. The front head lights were too basic and needed some attention. Just a real good sanding then a nice coat of white primer and we're off. I Should have some pictures of the painted interior real soon.
Onward...
Re: Cox Chaparral 2D project...
12. Nov 2011, 16:56
Onwards....
Re: Cox Chaparral 2D project...
12. Nov 2011, 17:36
!!!Very nice .
Greetz , Ralf
Re: Cox Chaparral 2D project...
12. Nov 2011, 19:12
In Germany we say WUNDERSCHÖN !

best regards Eisenhein
Re: Cox Chaparral 2D project...
15. Nov 2011, 20:08
here's some photos before clear coat.
onward...
Re: Cox Chaparral 2D project...
16. Nov 2011, 00:06
Onward...
Re: Cox Chaparral 2D project...
19. Nov 2011, 21:43
nothing more to say
Re: Cox Chaparral 2D project...
21. Nov 2011, 16:34
Thanks a lot for sharing!
And although it might be small-minded, the only thing i don´t like too much
is the black colored clearance between doors and body. Maybe a light grey or
dirty white would have been the better choice.
We´re looking forward to see next steps of the assembly.
Best regards.
Re: Cox Chaparral 2D project...
15. Dez 2011, 16:20
Anyway, onward to the finish!
Re: Cox Chaparral 2D project...
15. Dez 2011, 16:34
absolute genius!!!
Re: Cox Chaparral 2D project...
15. Dez 2011, 16:55
that's a wonderful car!
Great job!
Re: Cox Chaparral 2D project...
15. Dez 2011, 23:40
I hope you can give us more pictures, please!
Kind regards,
ecki
Re: Cox Chaparral 2D project...
17. Dez 2011, 21:36
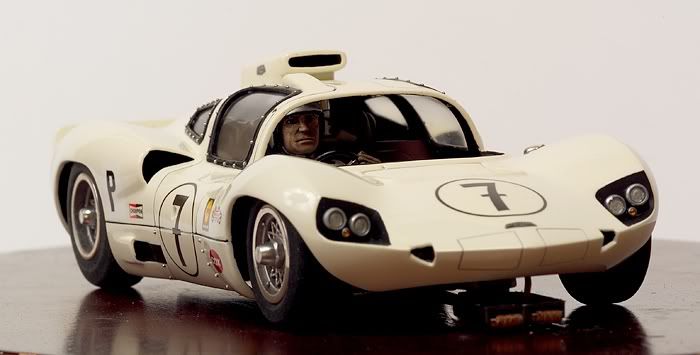
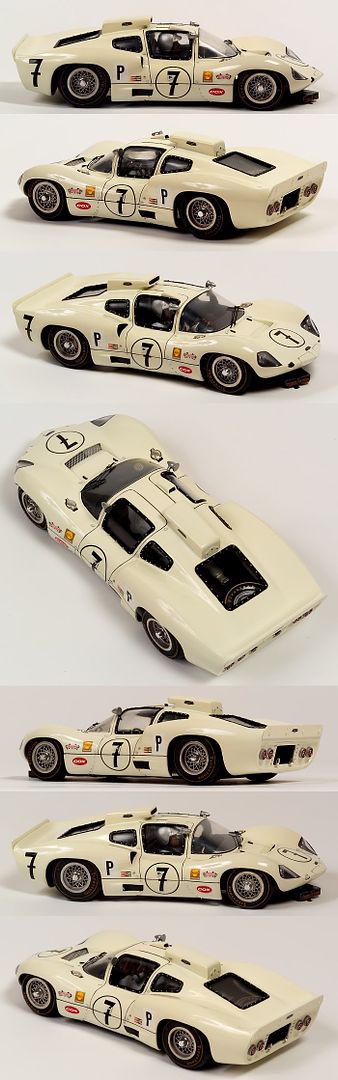
well the end is here - it took a long time to pull this off but I think it was worth it in the end....

Re: Cox Chaparral 2D project...
17. Dez 2011, 22:04
no words to say
unbelievable
Re: Cox Chaparral 2D project...
17. Dez 2011, 23:34
Duffyhs hat geschrieben:.................
no words to say
unbelievable
...allright...
really brilliant work!!
how du you make the fine lines e.g. the lamp-covers on the front?
best regards
Daniel
Re: Cox Chaparral 2D project...
19. Dez 2011, 15:27
The hinges.... I tried all kinds of things to pull this off and in the end I did like this...
The rivets I use have a tail and once you have them in the holes and glued you cut the tail off. I got all the rivet tails and cut them down to size and glued them into the door grove with small spacing between each one. This gave a great effect of hinges. Simple and looks amazing. The problem was getting to that simple method. Who what have thought;).
Thanks lads - nice one!
more photos
Re: Cox Chaparral 2D project...
19. Dez 2011, 23:26
Re: Cox Chaparral 2D project...
20. Dez 2011, 12:06
simply PERFECT!
How many time have you spend in this model? (round about)
Bei iphpbb3.com bekommen Sie ein kostenloses Forum mit vielen tollen Extras
Forum kostenlos einrichten - Hot Topics - Tags
Beliebteste Themen: Bau, USA, Mode, Erde, Bild
Impressum | Datenschutz