Land Rover, Camel
9. Apr 2007, 11:55
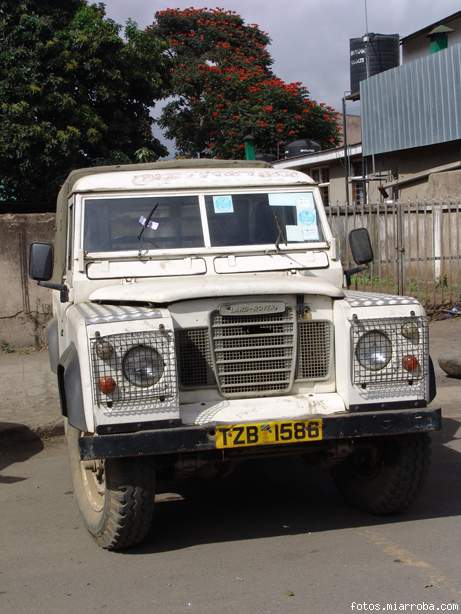
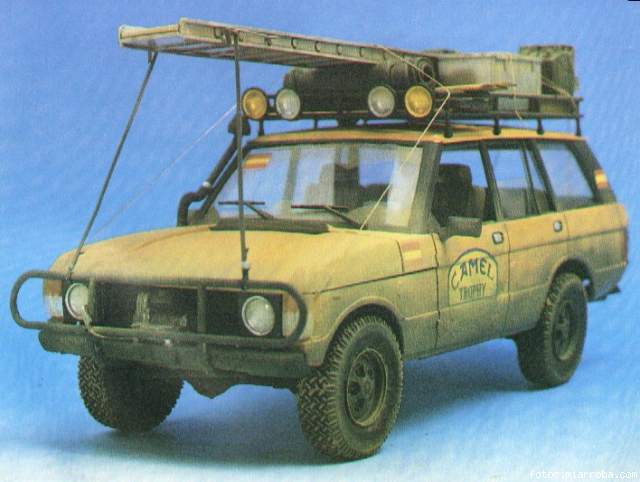
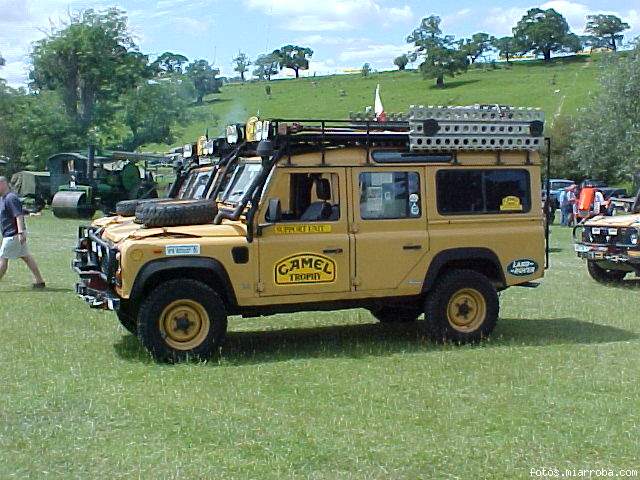
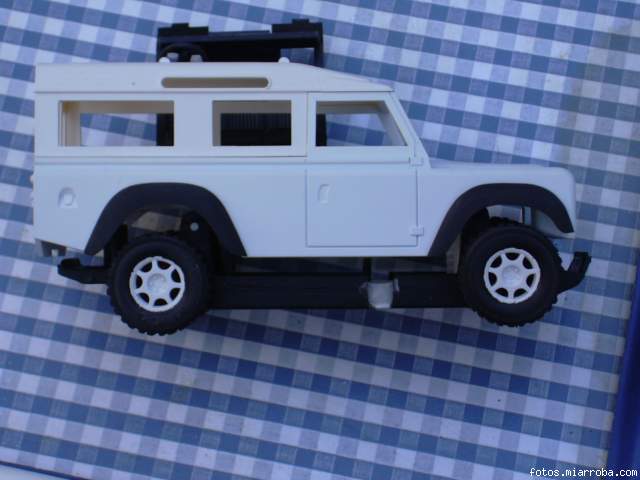
We buy in England a few land rover of plastic between(among) a few foreros after having the mio in my power... To looking for decoration, and since(as,like) it(he,she) could not be of another form, my subconscious, the classic one was crying out for a decoration of the Camel Trophy, but not to make myself I decided for one of the cars that the organization of the event goes as help for the competitors.....
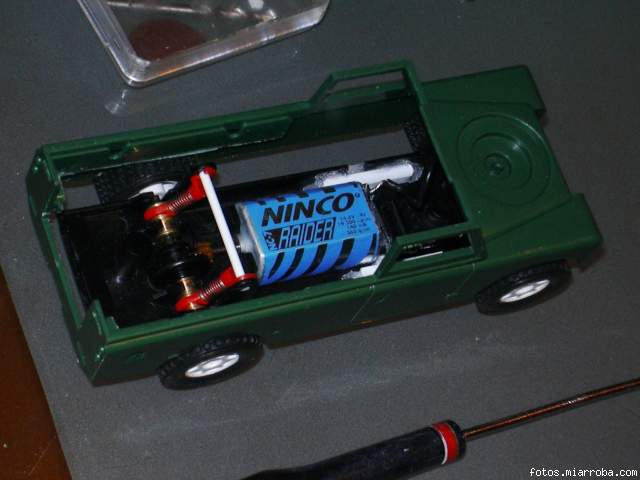
The first thing to look for chassis, since the car has a rather small scale 1/35 I decided on the pajero of ninco, that once cut the wings of the chassis, it(he) was perfect in width. The first two disadvantages. The steps of wheel were not squaring, with which it is necessary to shorten a few millimeters the chassis and that the tips of suspension do not enter the exterior of the axis(axle), since this one it is necessary to cut it away in width..
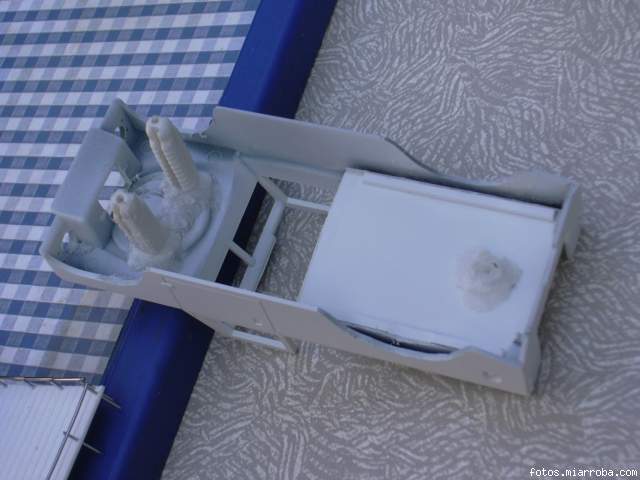
Then to cut to the chassis... and for the suspension a new inner support, for it I make two holes, coincident with the old supports and him amount a barrita of inner plastic. The body I lighten it inner so that the suspension between perfectly
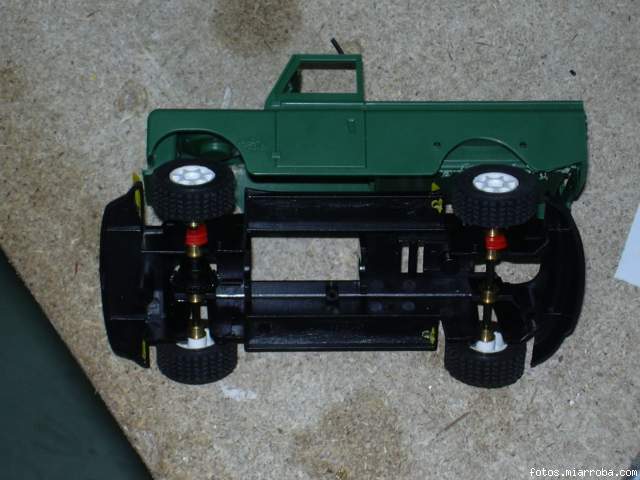
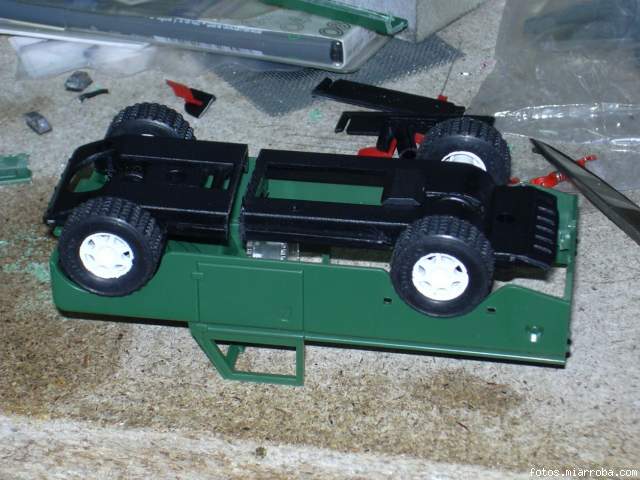
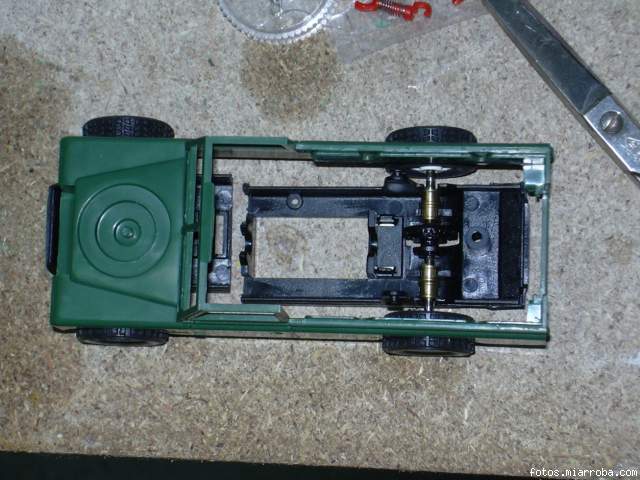
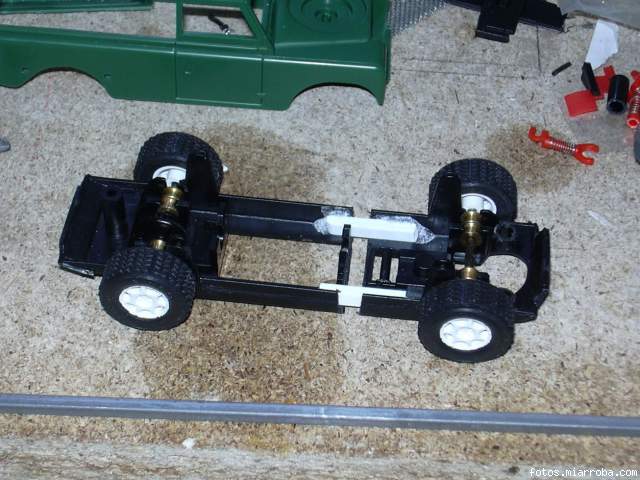
The completed chassis.
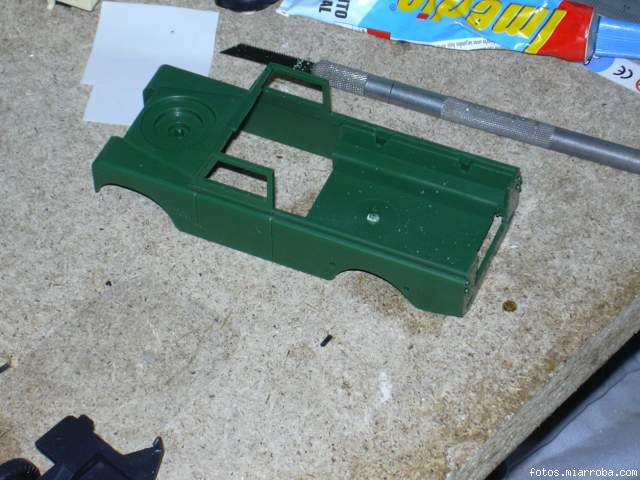
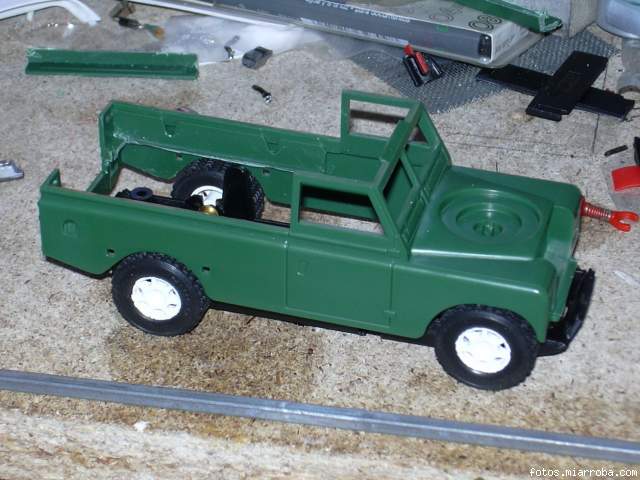
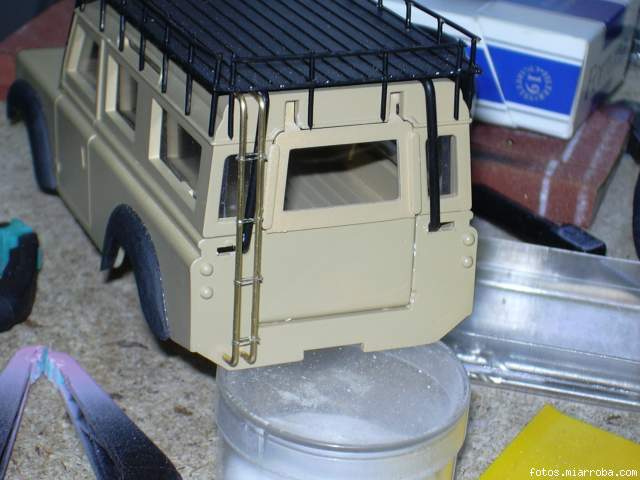
The following step to close the holes that takes the car in lateral and the back part, as well as those of overturn it. To this I add to him you shiver of plastic that sera where it supports, at its moment the roof rack-portadetodo, you see it here already printed to be able to appreciate perfectly if it needs adjustments.
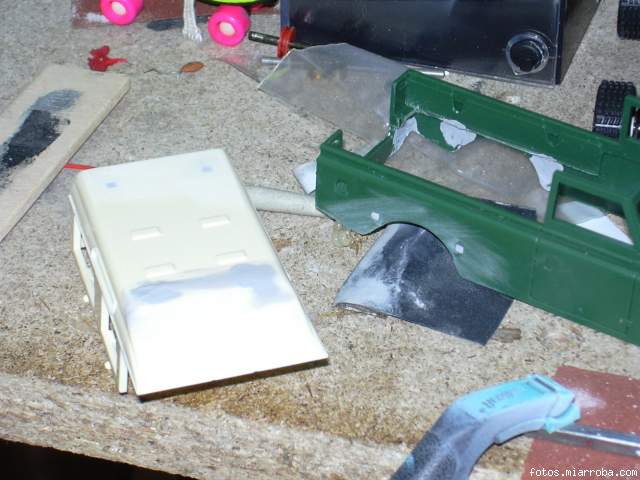

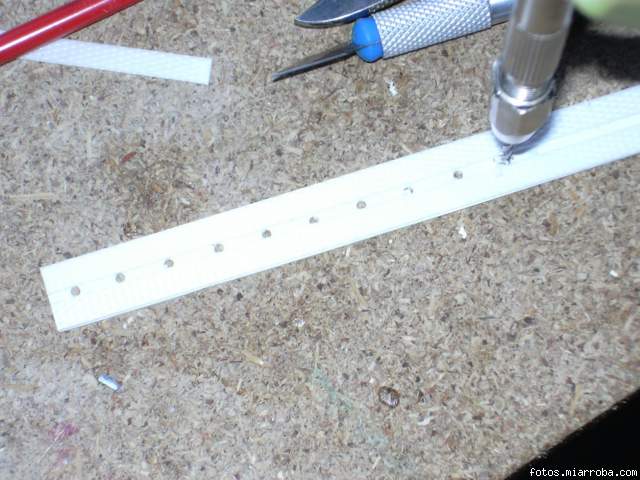
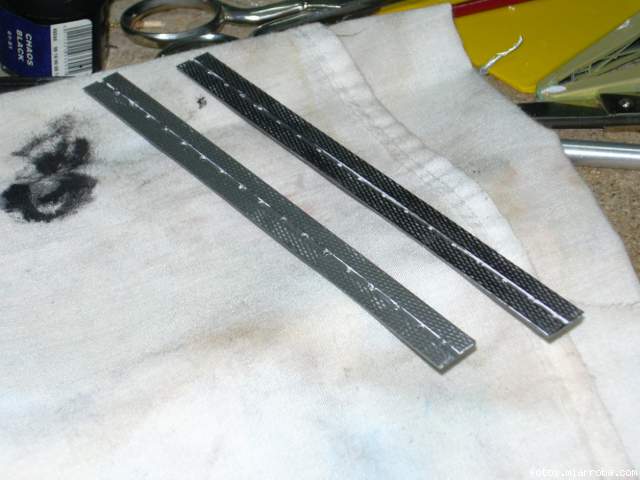
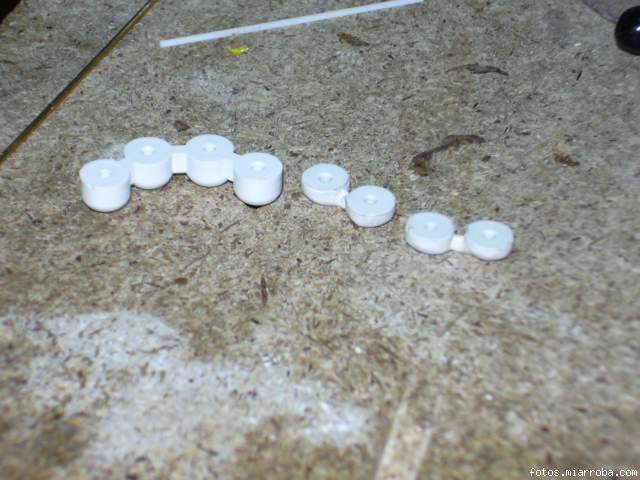
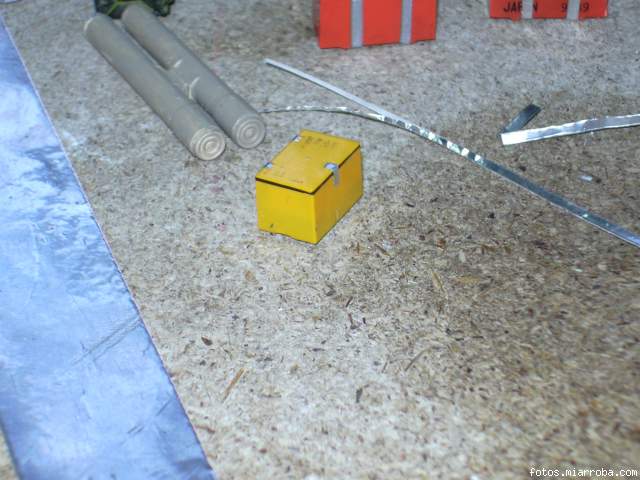
Arrived at this point I let it dry and I make one of the components that will take in the roof rack, is billets, to pass cuts of the land unsalvable of another form. For it on a plastico strip I beat in lateral the two you shiver to sprint of those of white plastic that surround the boxes by cardboard and in the center of the two I make holes to him. Cut to size, they could serve perfectly as aid to leave catched wheel. Once dry the glue, just a little bit of painting and lists.

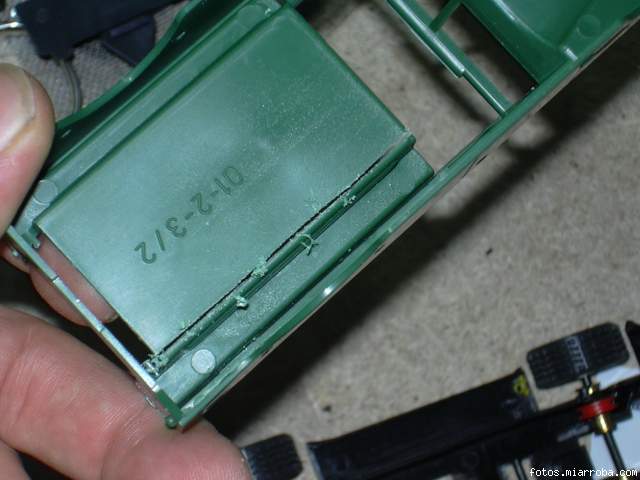
We closed the back cockpit again and we mounted tacos to him of wall for the anchorage of the chassis
[img]http://fotos.miarroba.com/fotos/3/6/36db9448.jpg[/img ]
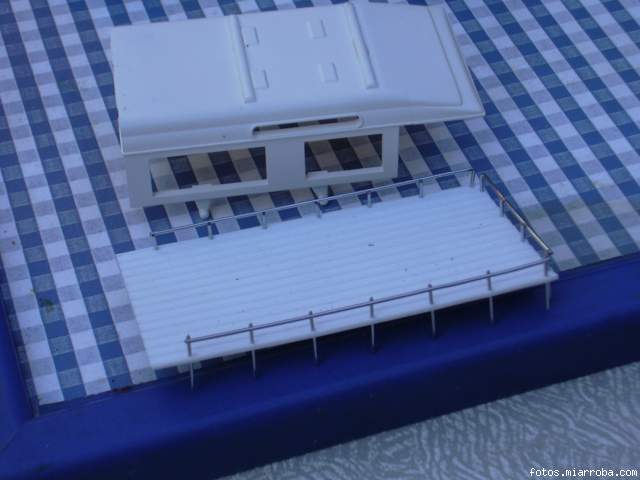
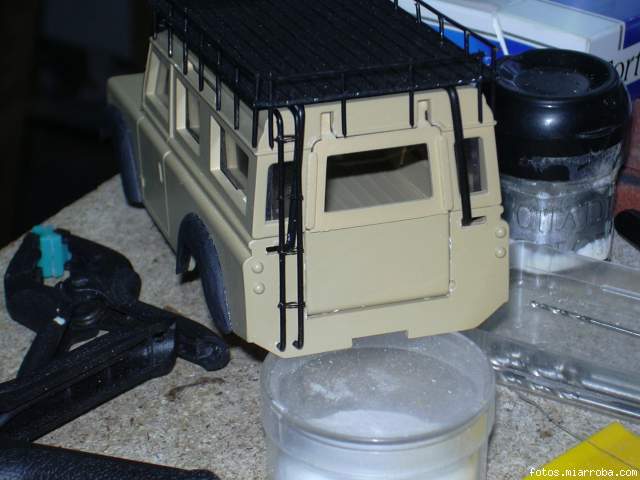
The roof rack I make it with the same plastic, and with aid of a dispensador of napkins that I found in a Chinese, I put the railing to him, I make holes around and I cross with the wires.
[img]http://fotos.miarroba.com/fotos/e/4/eêacdad.jpg[/img]
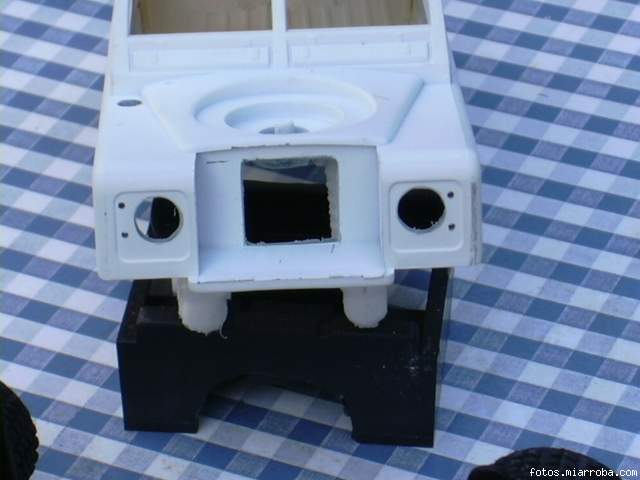
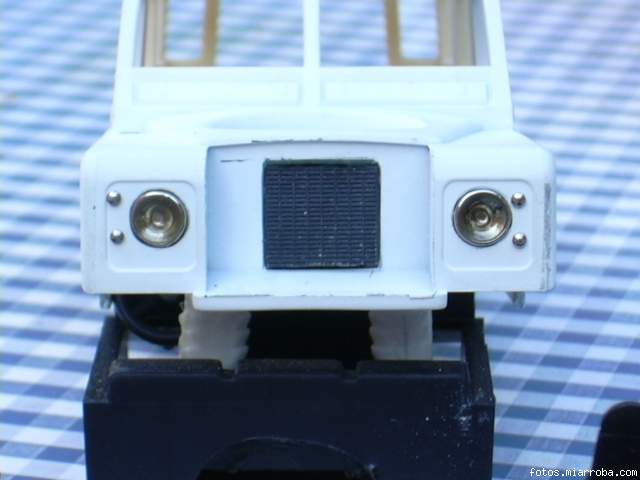
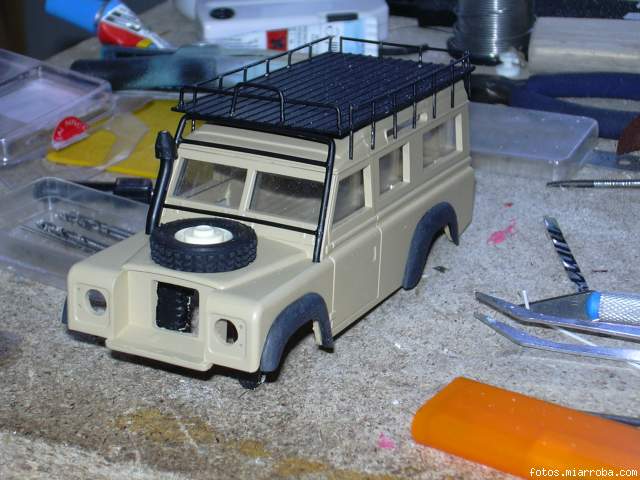
The nose we adapted to him to the model at issue, lights, intermittent, and the radiator... Esoty preparing to him a protection grid, but still this in diapers...
[img]http://fotos.miarroba.com/fotos/2/0/206e1é5.jpg[/img]
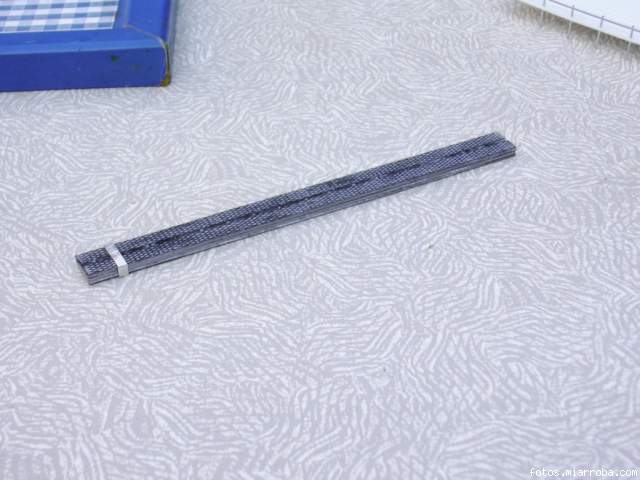
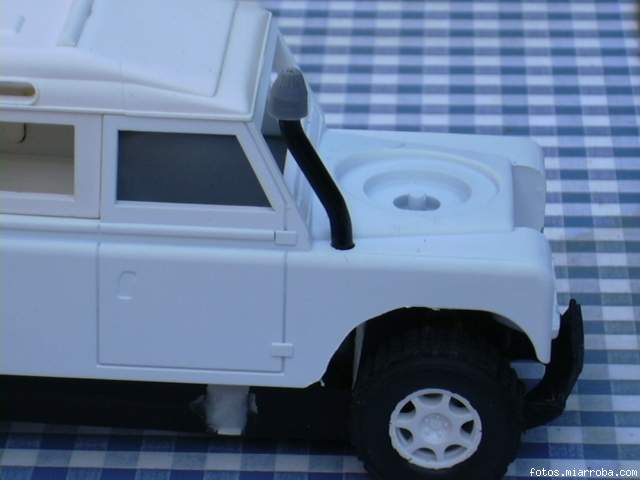
We prepared the exhaust pipe, a barrita of plastic, twisted by good with the hand and a plastic piece in pointed hood form, with Lima.
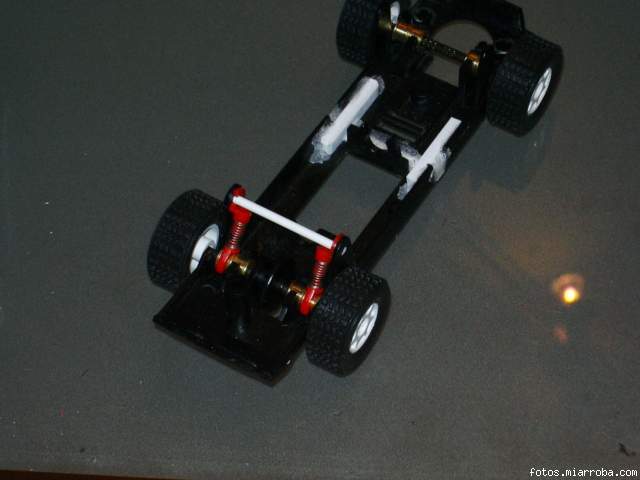
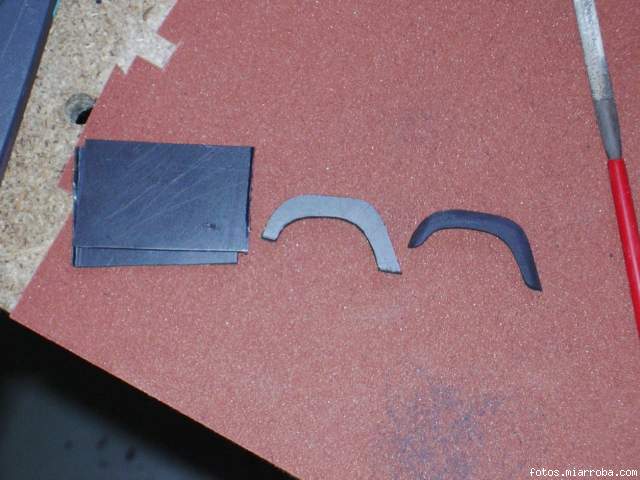
Although this model of land to rover did not take the protectors of wheel passage, in its participation in camel trophy, I I am going away them to put to gain a little to him space, for the suspension of the chassis. I stick three black plastic pieces, with loctite and with cuter and files I give form him, the good thing of this plastic it is that once finished the carving process, you pass a sandpaper to him to the water and is exactly just as really with no need to paint it nor to give varnish him kills.
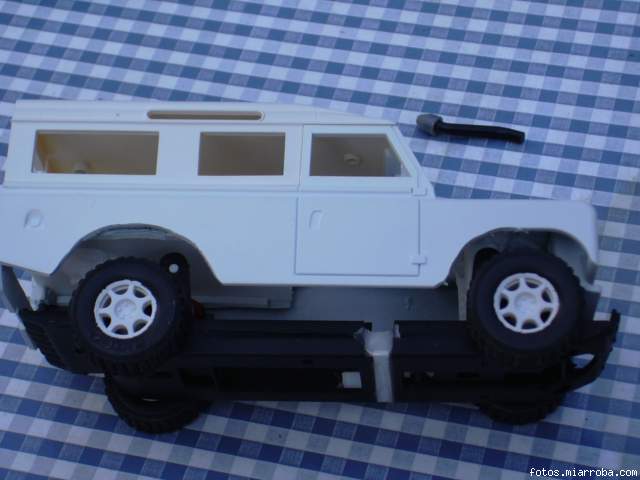
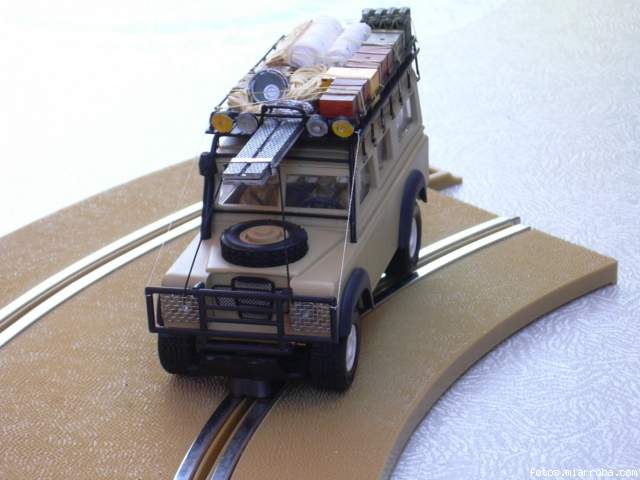
And until aqui I have arrived, I show a preassembly to you of the set, the additions of the roof rack estan made with paper coiled and tied with thread silver, a cord also done of thread, electronicos rest of scale models to 1/35, and components...
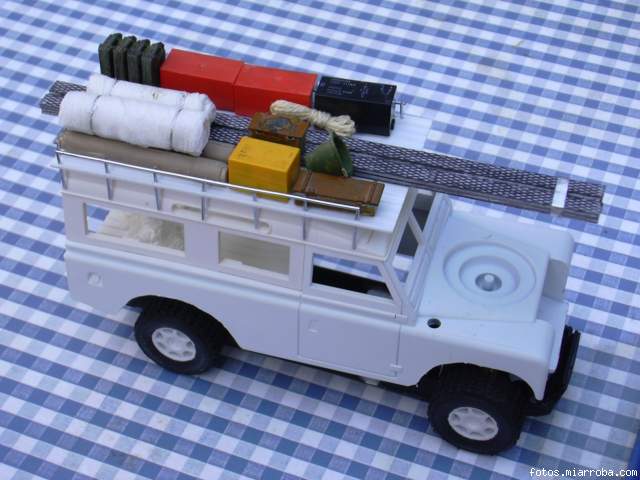
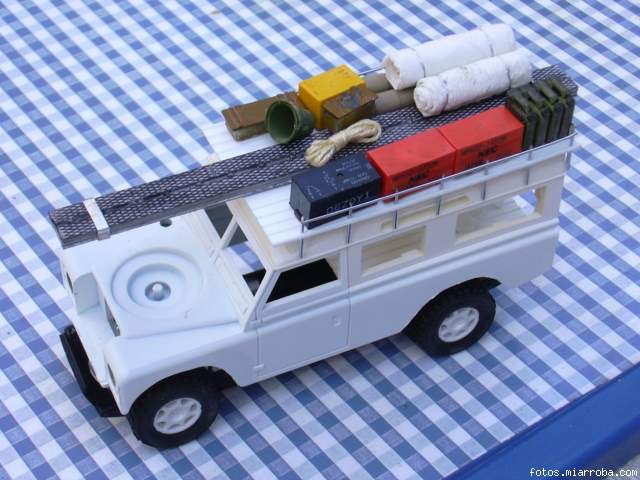
Still lack much, mainly in the front part... protections, harnesses, front part of the roof rack, decoration, back stairs... Manitas of painting with tamiya in espray for the body and brush and black kill for the roof rack.... I prepare with a fine barrita of evergran the reinforcements front and back...
[img]http://fotos.miarroba.com/fotos/9/d/9d06ébc.jpg[/img]

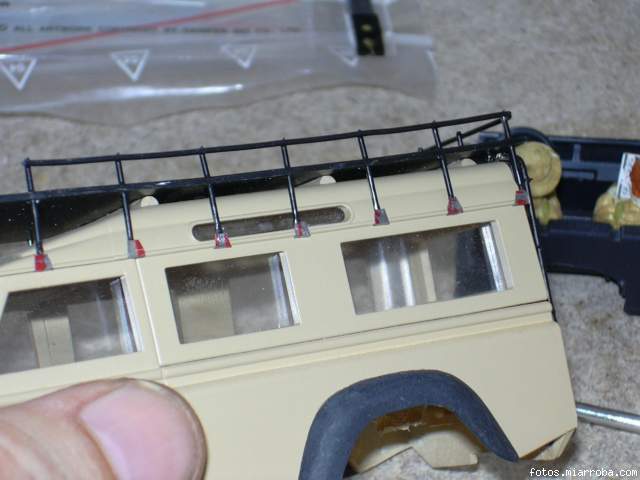
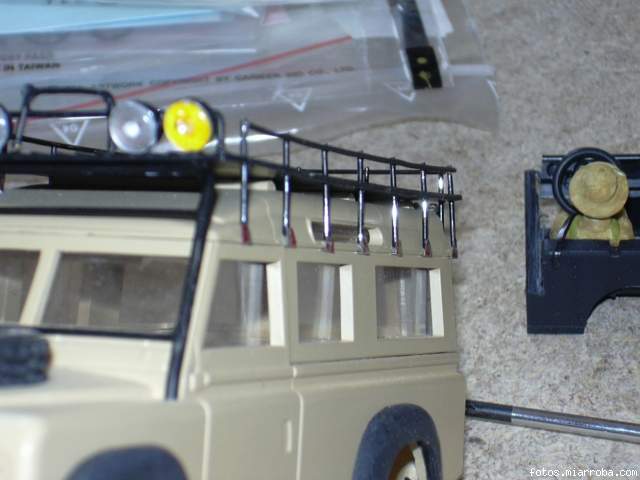
using as it bases a farera, I prepare the auxiliary lights of the ceiling, for it the recess in width, pinto the interior and amount the crystal, I prepare with brass the attachment of these and it amount.
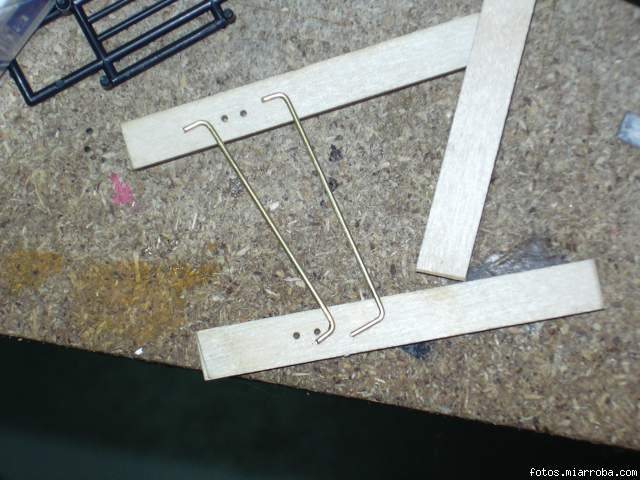
the following step to prepare the stairs of ascent to the ceiling, for it I prepare a base for its accomplishment. Three maderitas, where I make four holes to hold and to compare the largeros, once subject with silver thread, (single the color), I make the steps, that I beat with loctite.
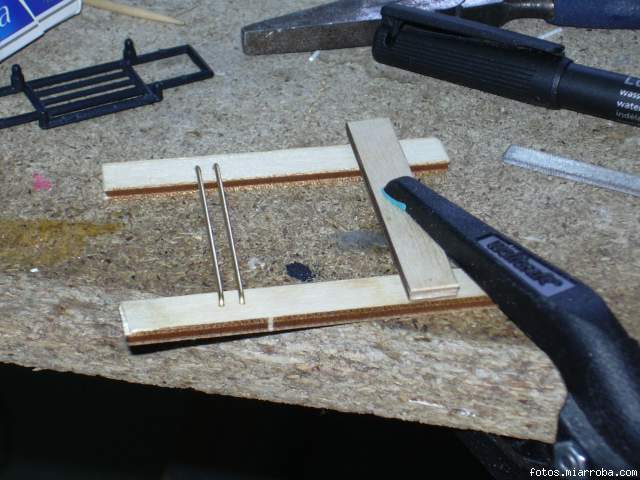

All once dry one I raise it in the back to make the holes to mount it, it is painted and one mounts...
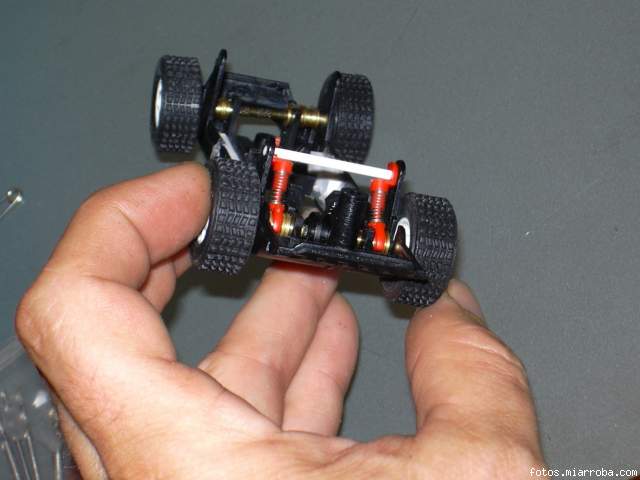
First copik, when going to mount it I realized of which it was sunk very, with which cuts the lateral ones so that the pilots did not seem adolescent in camel tropy, and thus to gain altitude.

[img]http://fotos.miarroba.com/fotos/f/4/f4éef6b.jpg[/img]
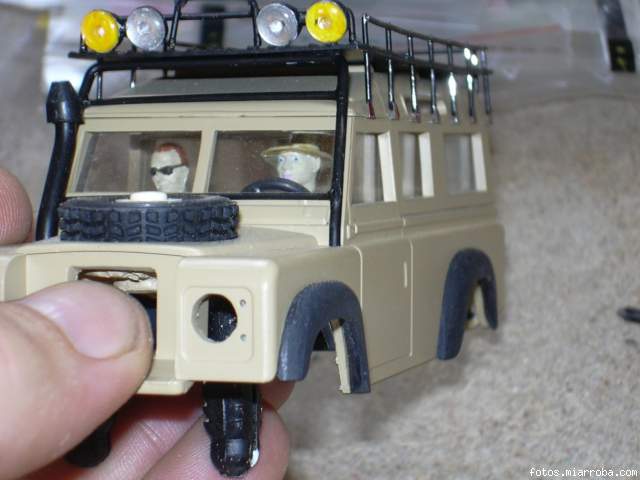
Later to complete the roof rack, the Abel teacher I comment that he is was united to the ceiling through a bar and screws but since had left the subjection wires short, I did not have more remedy than to make piececitas to them with cocaine user tin, as a anchorages.
And aqui with the premounted pilots
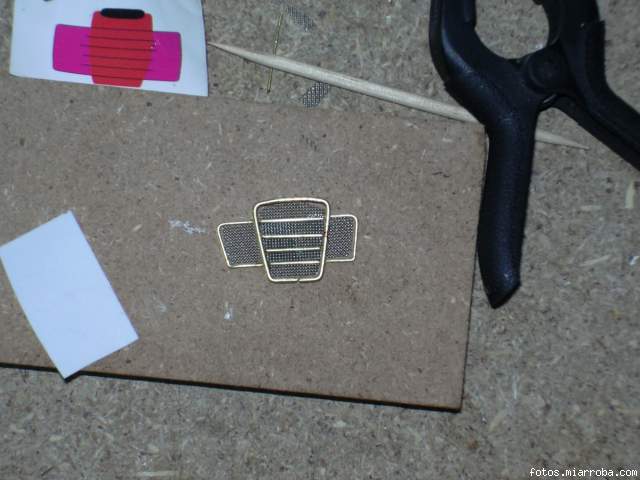
Following step advantage, (porqué I in these messes will put), then, since these land rovers mounted a very characteristic grill, I decided to reproduce it, (in which hour), first to repair nose of car since by cagaprisas the piece hole that I did for the radiating excessively enormous era to him, so piece of evergran and to cover the broken one, with computer draws the front defense to me to fit it to measures and taking it as it bases, "al ataqerrrrr", with rod of brass and grid, yielded a long time ago by J.C. amiably, I arranged myself to make the front defense. After not whichever attempts, desperation and attempt to burn it everything, I was able to do one, minimumly decent one. And of course it does not touch more to it.
[img]http://fotos.miarroba.com/fotos/7/c/7cáãcf.jpg[/img]
[img]http://fotos.miarroba.com/fotos/6/0/60c9aã4.jpg[/img]
[img]http://fotos.miarroba.com/fotos/9/9/99b74cà.jpg[/img]
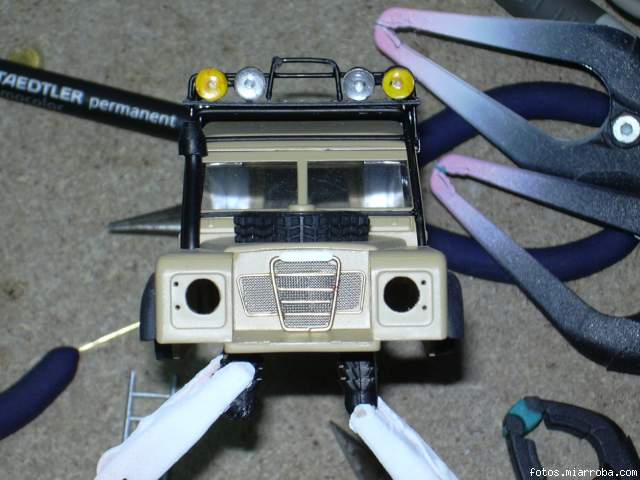
In order to complete the nose the defense of the lights, for it I have used the grids of the system anti splashes of the faucets, when disarming it encontrareís several grids, are of small size, but perfect for those small hollows that some times need them.
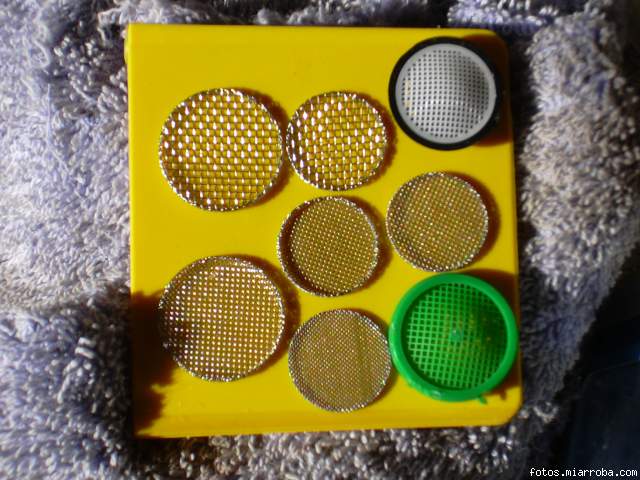
In the this less dense occasion she was perfect for the lights, the short one in square, I double the edges and to mount...
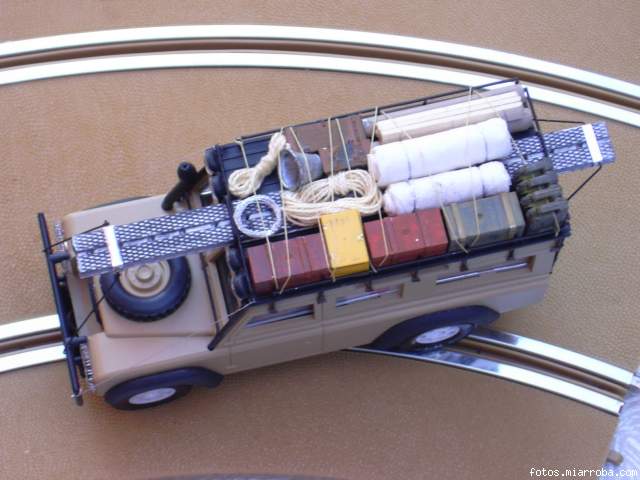
Following step to finish the artilujios of the roof rack and to mount them, the boxes are you throw of computer science components, with tirillas of plumber tape, I give returns them to sinular the closings and to paint.

Subject the long plates with brass rods, with silver thread I simulate the braces that go from the roof rack to the front defense, amount the other accessories I strongly tie them with thread to sew,:lol: so that it loses us in camel trophy (just in case, also, I have stuck them, but not digaís to the pilot, the laughter that I am going away to hechar when it tries to cojer something, ji, ji...) and awaiting the wheels.
[img]http://fotos.miarroba.com/fotos/1/4/1êa9b38.jpg[/img]
[img]http://fotos.miarroba.com/fotos/2/4/2êa8649.jpg[/img]
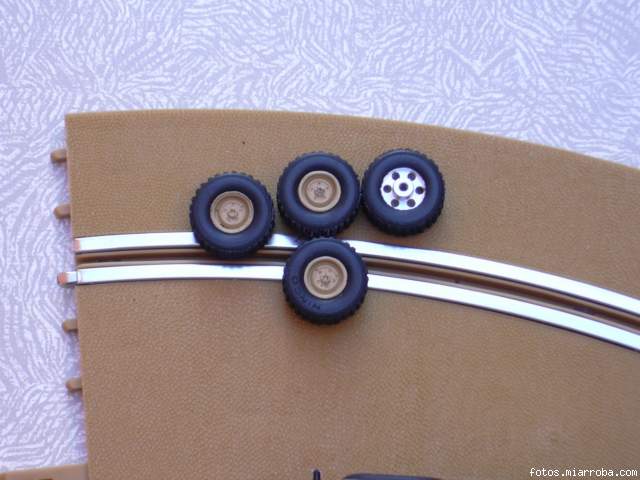
Single they lack the wheels, that for want of some I touch already of pintuara are mounted, but that I could not mount in land rovers so that not encontre axes that served to me, returned to the store.
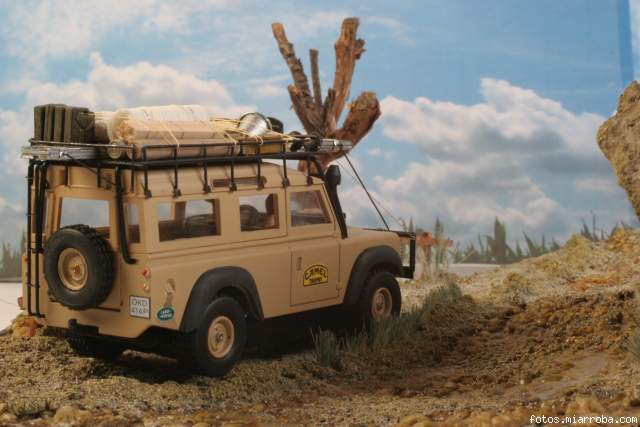
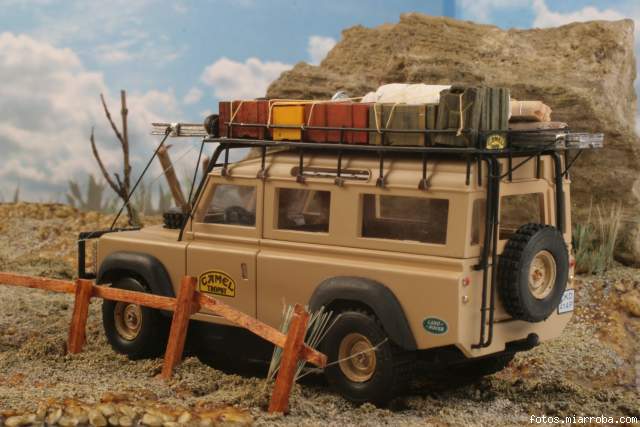
The next step granaries. It is so far the project longer than I have done. To finally I can show the photos you of the finished bichito, but not soiled, I am thinking about doing an effect to him mud, but it gives as much fear me that has been asi several months. Diorama is the one that presents/displays the first aid of Docslot. I suppose that some remembered it. The photos are work of Alpaca of the MasSlot magazine. Thanks for the photos Alpaca, impressive. In the magazine it appears a summary step by step.
[img]http://fotos.miarroba.com/fotos/1/c/ç8d83f0.jpg[/img]
The first thing to look for chassis, since the car has a rather small scale 1/35 I decided on the pajero of ninco, that once cut the wings of the chassis, it(he) was perfect in width. The first two disadvantages. The steps of wheel were not squaring, with which it is necessary to shorten a few millimeters the chassis and that the tips of suspension do not enter the exterior of the axis(axle), since this one it is necessary to cut it away in width..
Then to cut to the chassis... and for the suspension a new inner support, for it I make two holes, coincident with the old supports and him amount a barrita of inner plastic. The body I lighten it inner so that the suspension between perfectly
The completed chassis.
The following step to close the holes that takes the car in lateral and the back part, as well as those of overturn it. To this I add to him you shiver of plastic that sera where it supports, at its moment the roof rack-portadetodo, you see it here already printed to be able to appreciate perfectly if it needs adjustments.
Arrived at this point I let it dry and I make one of the components that will take in the roof rack, is billets, to pass cuts of the land unsalvable of another form. For it on a plastico strip I beat in lateral the two you shiver to sprint of those of white plastic that surround the boxes by cardboard and in the center of the two I make holes to him. Cut to size, they could serve perfectly as aid to leave catched wheel. Once dry the glue, just a little bit of painting and lists.
We closed the back cockpit again and we mounted tacos to him of wall for the anchorage of the chassis
[img]http://fotos.miarroba.com/fotos/3/6/36db9448.jpg[/img ]
The roof rack I make it with the same plastic, and with aid of a dispensador of napkins that I found in a Chinese, I put the railing to him, I make holes around and I cross with the wires.
[img]http://fotos.miarroba.com/fotos/e/4/eêacdad.jpg[/img]
The nose we adapted to him to the model at issue, lights, intermittent, and the radiator... Esoty preparing to him a protection grid, but still this in diapers...
[img]http://fotos.miarroba.com/fotos/2/0/206e1é5.jpg[/img]
We prepared the exhaust pipe, a barrita of plastic, twisted by good with the hand and a plastic piece in pointed hood form, with Lima.
Although this model of land to rover did not take the protectors of wheel passage, in its participation in camel trophy, I I am going away them to put to gain a little to him space, for the suspension of the chassis. I stick three black plastic pieces, with loctite and with cuter and files I give form him, the good thing of this plastic it is that once finished the carving process, you pass a sandpaper to him to the water and is exactly just as really with no need to paint it nor to give varnish him kills.
And until aqui I have arrived, I show a preassembly to you of the set, the additions of the roof rack estan made with paper coiled and tied with thread silver, a cord also done of thread, electronicos rest of scale models to 1/35, and components...
Still lack much, mainly in the front part... protections, harnesses, front part of the roof rack, decoration, back stairs... Manitas of painting with tamiya in espray for the body and brush and black kill for the roof rack.... I prepare with a fine barrita of evergran the reinforcements front and back...
[img]http://fotos.miarroba.com/fotos/9/d/9d06ébc.jpg[/img]
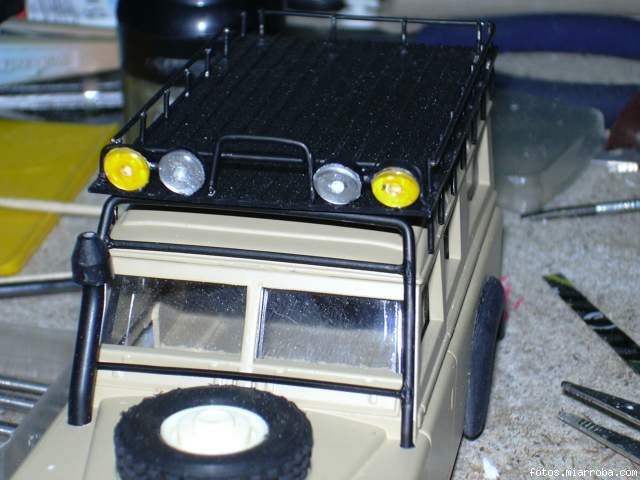
using as it bases a farera, I prepare the auxiliary lights of the ceiling, for it the recess in width, pinto the interior and amount the crystal, I prepare with brass the attachment of these and it amount.
the following step to prepare the stairs of ascent to the ceiling, for it I prepare a base for its accomplishment. Three maderitas, where I make four holes to hold and to compare the largeros, once subject with silver thread, (single the color), I make the steps, that I beat with loctite.
All once dry one I raise it in the back to make the holes to mount it, it is painted and one mounts...
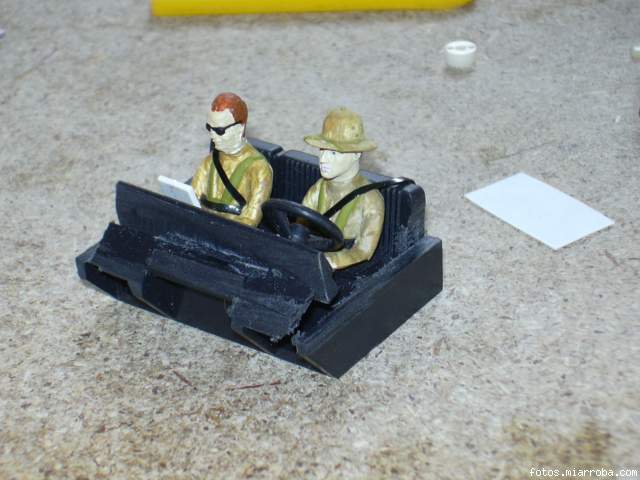
First copik, when going to mount it I realized of which it was sunk very, with which cuts the lateral ones so that the pilots did not seem adolescent in camel tropy, and thus to gain altitude.
[img]http://fotos.miarroba.com/fotos/f/4/f4éef6b.jpg[/img]
Later to complete the roof rack, the Abel teacher I comment that he is was united to the ceiling through a bar and screws but since had left the subjection wires short, I did not have more remedy than to make piececitas to them with cocaine user tin, as a anchorages.
And aqui with the premounted pilots
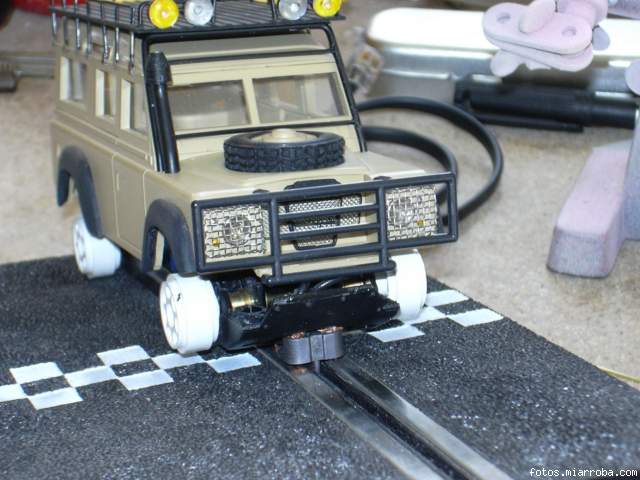
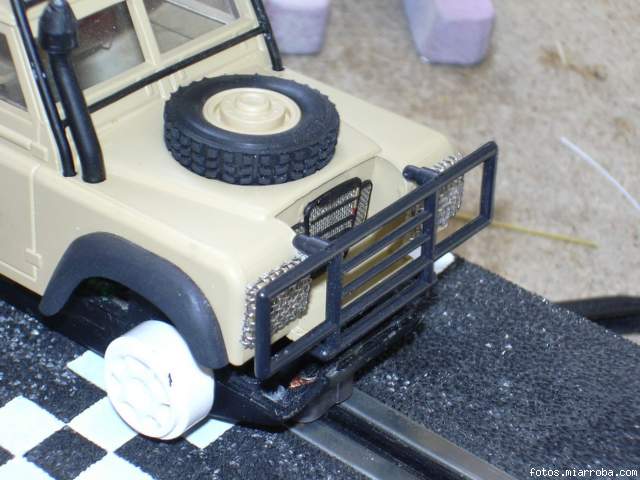
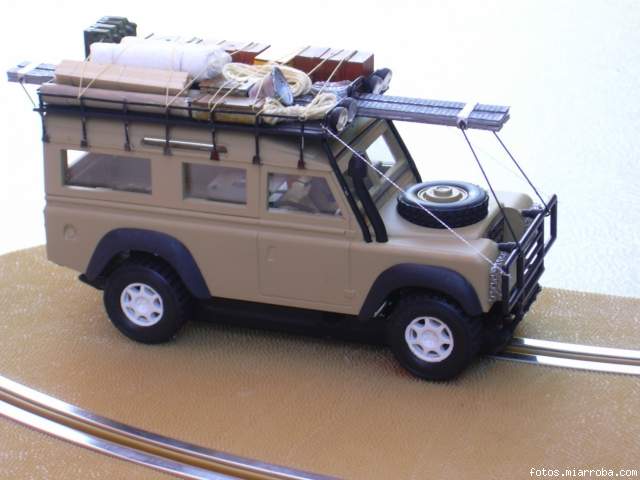
Following step advantage, (porqué I in these messes will put), then, since these land rovers mounted a very characteristic grill, I decided to reproduce it, (in which hour), first to repair nose of car since by cagaprisas the piece hole that I did for the radiating excessively enormous era to him, so piece of evergran and to cover the broken one, with computer draws the front defense to me to fit it to measures and taking it as it bases, "al ataqerrrrr", with rod of brass and grid, yielded a long time ago by J.C. amiably, I arranged myself to make the front defense. After not whichever attempts, desperation and attempt to burn it everything, I was able to do one, minimumly decent one. And of course it does not touch more to it.
[img]http://fotos.miarroba.com/fotos/7/c/7cáãcf.jpg[/img]
[img]http://fotos.miarroba.com/fotos/6/0/60c9aã4.jpg[/img]
[img]http://fotos.miarroba.com/fotos/9/9/99b74cà.jpg[/img]
In order to complete the nose the defense of the lights, for it I have used the grids of the system anti splashes of the faucets, when disarming it encontrareís several grids, are of small size, but perfect for those small hollows that some times need them.
In the this less dense occasion she was perfect for the lights, the short one in square, I double the edges and to mount...
Following step to finish the artilujios of the roof rack and to mount them, the boxes are you throw of computer science components, with tirillas of plumber tape, I give returns them to sinular the closings and to paint.
Subject the long plates with brass rods, with silver thread I simulate the braces that go from the roof rack to the front defense, amount the other accessories I strongly tie them with thread to sew,:lol: so that it loses us in camel trophy (just in case, also, I have stuck them, but not digaís to the pilot, the laughter that I am going away to hechar when it tries to cojer something, ji, ji...) and awaiting the wheels.
[img]http://fotos.miarroba.com/fotos/1/4/1êa9b38.jpg[/img]
[img]http://fotos.miarroba.com/fotos/2/4/2êa8649.jpg[/img]
Single they lack the wheels, that for want of some I touch already of pintuara are mounted, but that I could not mount in land rovers so that not encontre axes that served to me, returned to the store.
The next step granaries. It is so far the project longer than I have done. To finally I can show the photos you of the finished bichito, but not soiled, I am thinking about doing an effect to him mud, but it gives as much fear me that has been asi several months. Diorama is the one that presents/displays the first aid of Docslot. I suppose that some remembered it. The photos are work of Alpaca of the MasSlot magazine. Thanks for the photos Alpaca, impressive. In the magazine it appears a summary step by step.
[img]http://fotos.miarroba.com/fotos/1/c/ç8d83f0.jpg[/img]
9. Apr 2007, 11:55
9. Apr 2007, 12:05
Really a perfect car - incredible details!
Thank you for sharing!
:goodjob
Thank you for sharing!
:goodjob
9. Apr 2007, 21:23
Hi luismon,
thanks a lot for that great "how to..." story - really hot stuff, sratchbuilding at it's best! Very nice and realistic photos! Congratulations!
Best regards
Matthias
scr
thanks a lot for that great "how to..." story - really hot stuff, sratchbuilding at it's best! Very nice and realistic photos! Congratulations!
Best regards
Matthias
scr
10. Apr 2007, 18:28
Hello luismon,
it's fantastic. How much details are on these model? A really good job, the best Land Rover as a slotcar I have ever seen.
Best regards
Findulini
it's fantastic. How much details are on these model? A really good job, the best Land Rover as a slotcar I have ever seen.
Best regards
Findulini
12. Apr 2007, 16:01
Hello, luismon,
as a Landy-driver I must say: this is the best Landrover-slotcar I ever have seen. Thank you for your complete pictures!
I think, a little bit mud would be good for him.....
Where does the body come from? I would like to buy one or two!
Regards, Taffy
as a Landy-driver I must say: this is the best Landrover-slotcar I ever have seen. Thank you for your complete pictures!
I think, a little bit mud would be good for him.....
Where does the body come from? I would like to buy one or two!
Regards, Taffy
Bei iphpbb3.com bekommen Sie ein kostenloses Forum mit vielen tollen Extras
Forum kostenlos einrichten - Hot Topics - Tags
Beliebteste Themen: Bau, USA, Mode, Erde, Bild
Impressum | Datenschutz